
Disclosure: I was provided with samples from Cricut as part of their blogger program to highlight brand and products for the holiday season. All views shared are mine and mine alone.


I can't believe that Christmas is almost here, can you?! Last year felt like it would never end, and now this year is flying by. After just celebrating Thanksgiving and being thankful for so much, including family and friends, I wanted to do something special this holiday season in terms of holiday gift giving. Instead of just buying a gift at a store, I was thinking to have my two girls help me and use our Cricut Maker 3 cutting machine to come up with some fun Christmas Cookies in a Jar, that could then be used as holiday luminaries for years to come. Also, I had been playing around my with Cricut during Covid and learned how to cut wood and make wooden tags, so thought making a wooden tag that could be dual purpose -- a tag to show who each gift belongs to, plus the reverse side would be an ornament that could adorn your tree this year and for years to come. Once I told my girls the plan, they were just as excited as I was for this fun Christmas Gift Ideas using our Cricut cutting machine, and couldn't wait to get started.
So, this past weekend, while most people were out holiday shopping, trying to get some good deals and steals, we were busy in our craft room and kitchen coming up with a game plan on how we wanted the Christmas Cookies in a Jar to look, as well as think about the wooden tags/ornaments, and how we wanted it all to look. After playing around with different designs found in the Cricut Design Center, we decided on a snowflake for one jar, and a Christmas tree for the other. My oldest daughter wanted to make homemade cookies and fill a jar for her maternal grandparents to enjoy -- and knew just the cookies to surprise them with....snickerdoodles (see below for the recipe we use), as this is the first cookie my girls baked together with my mother when they were little, and continue to bake together whenever they go to visit and sleep over. And, for the other jar, we liked the idea of making the layered Christmas cookies in a jar mix, as this could be given to both family and friends, as we know everyone loves to bake and enjoy freshly baked cookies, especially around the holidays. Once we had our game plan, we rolled up our sleeves and got to work preparing our cookie mixes in a jar, baking cookies to fill the jars with, and then turning to our Cricut Maker to make our vinyl cutouts for the jars, then used the Cricut pens to draw embellishments on the wood and cardstock pieces that were then cut out into wooden ornaments and cardstock tags.
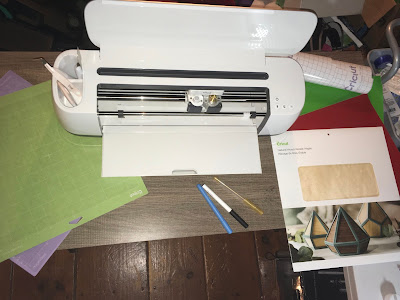
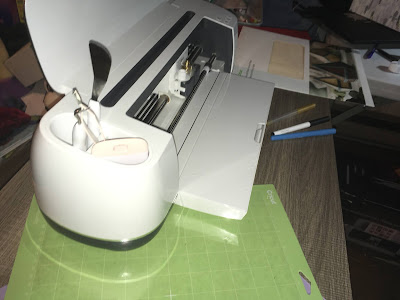
It gets real when we set up our Cricut Maker 3 and get to crafting :-)
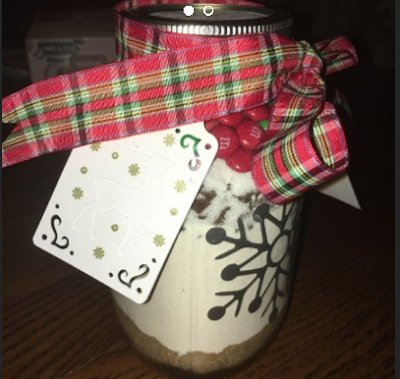
We were having so much fun crafting and baking together, and really love how the final product came out. Take a look...
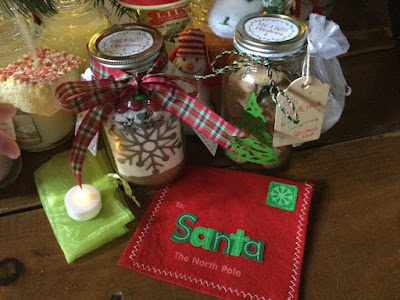
Christmas gifts made with love by my girls, and with a little help from our Cricut Maker 3 machine


Want to make Christmas Cookies in a Jar that then come luminary jars with wooden ornament tags for the tree like my girls and I did and I shared above? It really is an easy process. If you are a member of the Cricut Design Space, you can visit the following links to see the two Cricut Crafts I made and uploaded to the design space. Each project will show the fonts and images I used, along with all the Cricut supplies and tools needed, along with some helpful tips while crafting.

Here are the two links:
Season's Greetings Christmas Tree Jar 2021 - Cookies and Luminary Jar Gift

Season's Greetings Snowflake Jar 2021
--
As I mentioned above, here is the snickernoodle recipe my mom and girls make, and that my girls followed to fill mason jars with freshly baked cookies over the weekend. They were so good, that we maybe ate a jar or two that were meant to be gifted...but, don't worry we plan to bake up more and fill and decorate more mason jars with fun Christmas images and fonts found in the Cricut Design Space.
Snickerdoodle Recipe:

Yields 2 Dozen cookies
Ingredients:
3 cups all purpose flour
2 teaspoons cream of tartar
1 teaspoon baking soda
1 1/2 teaspoons ground cinnamon
1/2 teaspoon salt
1 cup butter, softened at room temperature (or melted 10-15 seconds in microwave)
1 1/3 cups granulated sugar
1 egg (at room temperature)
1 egg yolk (at room temperature)
2 teaspoons vanilla extract
1/3 cup granulated sugar (for rolling)
1 teaspoon ground cinnamon (for rolling)
Directions:
1. Pre-heat oven to 375 degrees. Line a cookie sheet with parchment paper or a silicone baking sheet.
2. In a large bowl combine all dry ingredients -- flour, cream of tartar, baking soda, cinnamon and salt. Stir to combine, and then set bowl aside.
3. In another bowl, add room temperature butter and sugar. Then, with stand or hand mixer, mix to combine until you longer see the sugar -- don't over mix. Once combined, add the egg at a time, and mix to combine, followed by the vanilla extract. Once mixed, slowly add in the dry ingredients a little at time, until you know longer see the flour.
4. Once all the dry ingredients are added to the wet ingredients, put the bowl aside, and grab a small bowl to combine the sugar and cinnamon to make mixture to roll the dough balls in.
5. Using a cookie dough scooper or your hand, make small balls of dough, and then roll each around in the cinnamon sugar mixture before placing on the cookie sheet. Continue to do this until you fill up a cookie sheet - making sure to leave at least 2 inches of space between cookies, as they will expand and spread during baking.
6. Place baking sheets with cookie dough balls in oven and bake for 10-12 minutes. Then, remove and let cool on cookie sheet for another 10 minutes, before removing to a plate. Enjoy!
*If you have leftover cookies, be sure to store them in a container to stay fresh.
---
And, for the cookie mix recipe, we went with one we found over at Sally's Baking Addiction. She had one for soft M&M and chocolate chip cookies that had our mouths watering at the picture.

I liked how she had a free printable tag with instructions, which you can print out and string to the mason jar, along with your own cut out cardstock or wooden tags you make with your Cricut cutting machine.
---
I have been using my Cricut Maker 3 for almost four years now, and love whenever a holiday or birthday comes around, as I get to get crafty and make my own personalized gifts, decorations, greeting cards, etc. for those special people in my life. I don't know what I would do if I didn't own a Cricut cutting machine, as it really became a game changer and an essential player in my holiday planning and DIY gift making. If you don't own a Cricut cutting machine -- which comes in three versions -- Cricut Joy, Cricut Maker 3, Cricut Explore 3 -- I highly recommend you pick one up and start using it this holiday season for our all Christmas crafting and gift ideas.
Once you make your first greeting card or vinyl cut out, you will be hooked, and want to spend hours seeing what fun personalized gift ideas and craft projects you can come up. I sure do have a blast, and now my two girls are Cricut fans, too! Even my husband has gotten in on the fun and makes iron on designs to spruce up his plain white t-shirts. You can learn more about Cricut and the different machines I mentioned above by visiting Cricut today. I can't wait to see what you come up with this holiday season when you get crafty with your very own Cricut cutting machine. Happy Cricut Crafting! :-)
Disclosure: I was provided with samples from Cricut as part of their blogger program to highlight brand and products for the holiday season. All views shared are mine and mine alone.
No comments :
Post a Comment